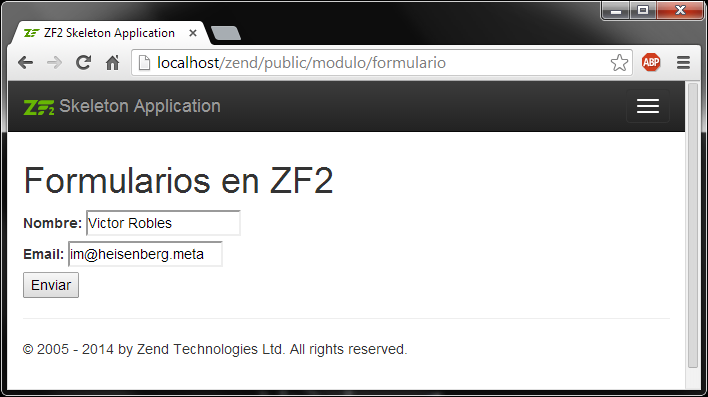
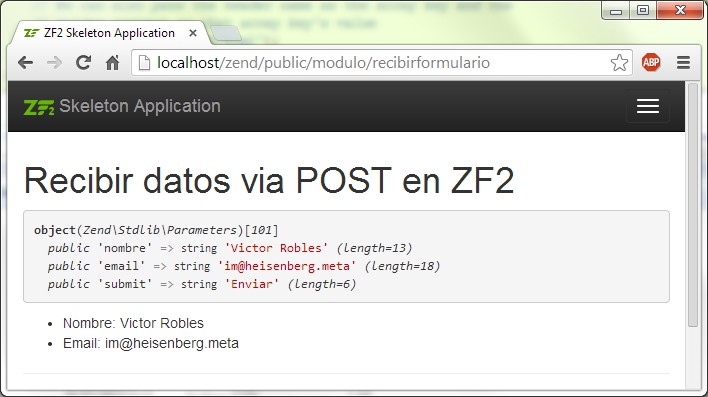
Para crear formularios en Zend Framework 2 tenemos que definir clases que extiendan al componente Form(evidentemente también podemos ponerlos en las vistas directamente en HTML). Dentro de src hay que crear un directorio llamado Form y dentro irán los ficheros de cada formulario.
El formulario module/Modulo/src/Modulo/Form/FormularioPruebas.php
<?php
namespace Modulo\Form;

use Zend\Captcha\AdapterInterface as CaptchaAdapter;
use Zend\Form\Element;
use Zend\Form\Form;
use Zend\Captcha;
use Zend\Form\Factory;

class FormularioPruebas extends Form{
				//Le ponemos un nombre al formulario
    public function __construct($name = null){
        parent::__construct($name);

		//Podemos añadir campos al formulario de esta forma
        $this->add(array(
            'name' => 'nombre',
            'options' => array(
                'label' => 'Nombre: ',
            ),
            'attributes' => array(
                'type' => 'text',
                'class' => 'input'
            ),
        ));

		//También podemos utilizar factory
        $factory = new Factory();

		//Creando elementos de una manera similar a la anterior
        $email = $factory->createElement(array(
            'type' => 'Zend\Form\Element\Email',
            'name' => 'email',
            'options' => array(
                'label' => 'Email: ',
            ),
            'attributes' => array(
                'class' => 'input_email',
                'id' => 'input_email'
            ),
          ));
        $this->add($email);

        //Creamos el boton de submit
        $this->add(array(
            'name' => 'submit',
            'attributes' => array(
                'type' => 'submit',
                'value' => 'Enviar',
                'title' => 'Enviar'
            ),
        ));
     }
}

?>
El controlador
<?php
namespace Modulo\Controller;

use Zend\Mvc\Controller\AbstractActionController;
use Zend\View\Model\ViewModel;

//Incluir modelos
use Modulo\Model\Entity\PruebasModel;

//Incluir formularios
use Modulo\Form\FormularioPruebas;

class PruebasController extends AbstractActionController{

    public function indexAction(){
        return new ViewModel();
    }

    public function formularioAction(){
		//Creamos el objeto del formulario
        $form=new FormularioPruebas("form");

		//Le pasamos a la vista el formulario y la url base
        return new ViewModel(array(
				"titulo"=>"Formularios en ZF2",
				"form"=>$form,
				'url'=>$this->getRequest()->getBaseUrl())
				);
    }

    public function recibirFormularioAction(){
		/*Este metodo se encarga de recojer los datos de el formulario
		* si a sido enviado y si redirecciona al formulario
		*/
        if($this->request->getPost("submit")){
        $datos=$this->request->getPost();
            return new ViewModel(array("titulo"=>"Recibir datos via POST en ZF2","datos"=>$datos));
        }else{
           return $this->redirect()->toUrl(
            $this->getRequest()->getBaseUrl().'/modulo/formulario'
            );
        }
    }

}
La vista, pintar el formulario
<h1><?php echo $this->titulo?></h1>
<?php
//Preparamos el formulario
$form = $this->form;
$form->prepare();

//Definimos el atributo action y method
$form->setAttributes(array(
    'action' => $this->url.'/modulo/recibirformulario',
    'method' => 'post'
));

//Utilizamos el plugin para mostrar los label
$formLabel = $this->plugin('formLabel');

echo $this->form()->openTag($form);
?>

<div class="form_element">
<?php
	//Imprimimos el campo nombre
    $nombre = $form->get('nombre');
    echo $formLabel->openTag().$nombre->getOption('label')." ";
    echo $this->formInput($nombre);
    echo $formLabel->closeTag();
?>
</div>


<div class="form_element">
<?php
	//Imprimimos el campo email
    $email = $form->get('email');
    echo $formLabel->openTag().$email->getOption('label')." ";
    echo $this->formInput($email);
    echo $formLabel->closeTag();
?>
</div>

<?php
//Imprimimos el boton de enviar
echo $this->formElement($form->get('submit'));

//Cerramos el formulario
echo $this->form()->closeTag();
 ?>
Podemos imprimir el formulario completo con
$form = $this->form;
$form->setAttributes(array(
    'action' => $this->url.'/modulo/recibirformulario',
    'method' => 'post'
));
$form->prepare();

echo $this->form()->openTag($form);
echo $this->formCollection($form);
echo $this->form()->closeTag();
recibirformulario.phtml
<h1><?php echo $this->titulo?></h1>
<?php var_dump($datos); ?>
<ul>
    <li>Nombre: <?=$datos->nombre?></li>
    <li>Email: <?=$datos->email?></li>
</ul>
Podemos conseguir mucha más información sobre formularios en la documentación oficial de Zend Framework 2:
Zend Form Quick Start
Como crear los diferentes elementos de los formularios


